Connect GitLab
Connect MeetAndy to GitLab.com or your self-hosted GitLab instance.
If your team uses GitLab, connect it here so Andy can read code and open merge requests. If your team uses GitHub, see Connect GitHub instead. You only need to connect one Git host.
GitLab setup is more involved than GitHub because GitLab needs a dedicated bot user account. Plan on 10–15 minutes. This is an admin-only step.
What you'll need
Before you start, have these on hand:
- Admin access to MeetAndy
- Admin access to your GitLab instance (or admin access to your group on GitLab.com)
- An email address you can use for a bot account (e.g.,
meetandyai@yourcompany.com) - For self-hosted GitLab behind a firewall: the ability to allowlist
34.223.170.213on your network so MeetAndy's proxy can reach your instance
Open the GitLab setup wizard
- Open Company settings → Integrations from the sidebar.
- Find the GitLab card and click Connect.
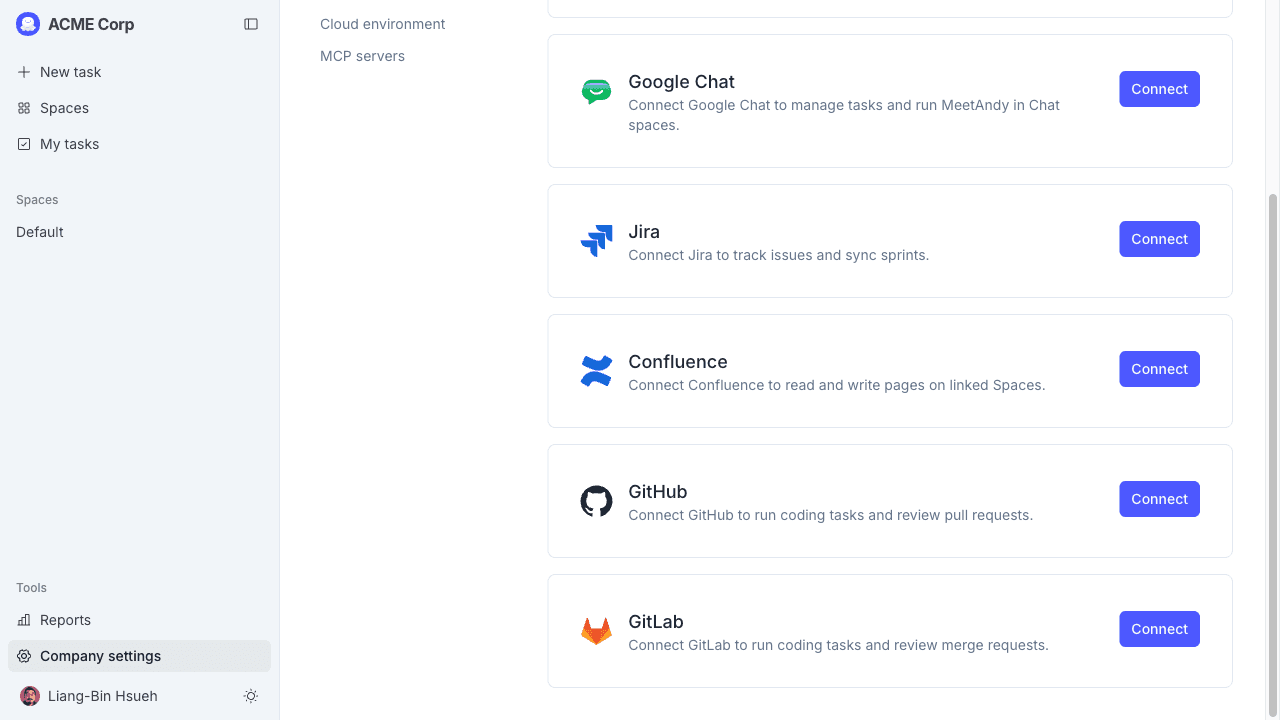
The setup is a 5-step wizard. Each step has copy buttons for values you need to paste into GitLab.
Step 1: Pick your GitLab type
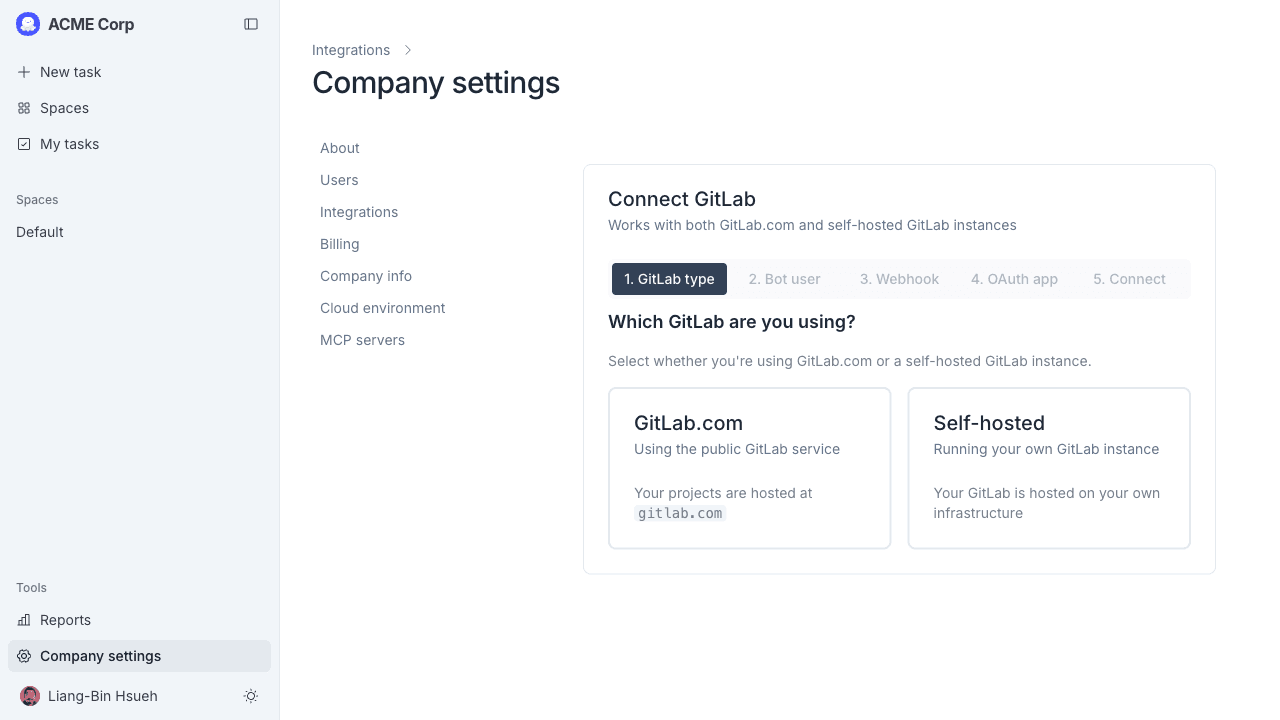
Choose where your GitLab lives:
- GitLab.com: the hosted service at gitlab.com
- Self-hosted: your own GitLab instance. Enter the full URL (for example,
https://gitlab.acme.com)
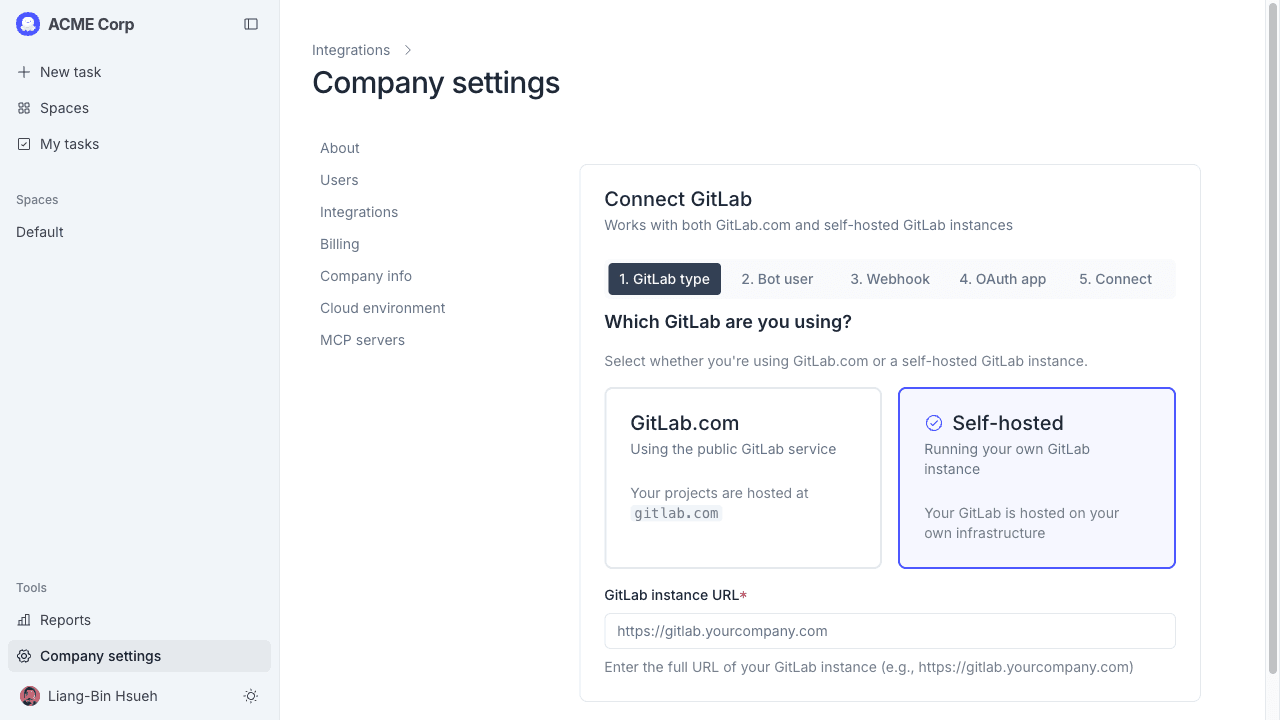
Click Next.
Step 2: Create the bot user
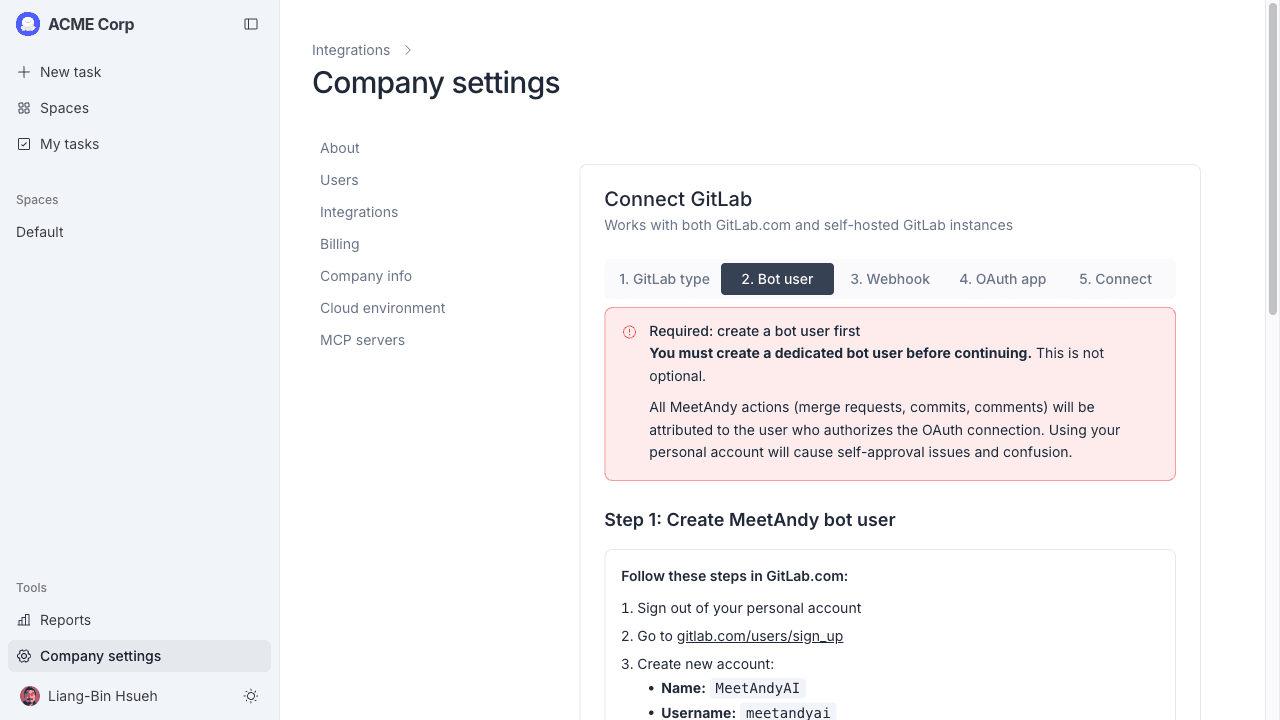
GitLab works best when MeetAndy connects as a dedicated bot user instead of a personal account. This avoids self-approval issues on merge requests and keeps the audit trail clean.
On GitLab.com:
- Sign out of your personal GitLab account.
- Go to gitlab.com/users/sign_up.
- Create the account with:
- Name:
MeetAndyAI - Username:
meetandyai - Email:
meetandyai@yourcompany.com(or any address you control)
- Name:
- Verify the email and sign in as the bot.
- Add the bot to the groups or projects you want Andy to access, with the Developer or Maintainer role.
On self-hosted GitLab:
- Sign in as a GitLab admin.
- Go to Admin Area → Users → New user and create the bot with the same name/username/email as above. You can use the Impersonate button later instead of setting a password.
- Add the bot to the relevant groups/projects with Developer or Maintainer role.
Tick the confirmation checkbox in MeetAndy and click Next.
Step 3: Set up the webhook
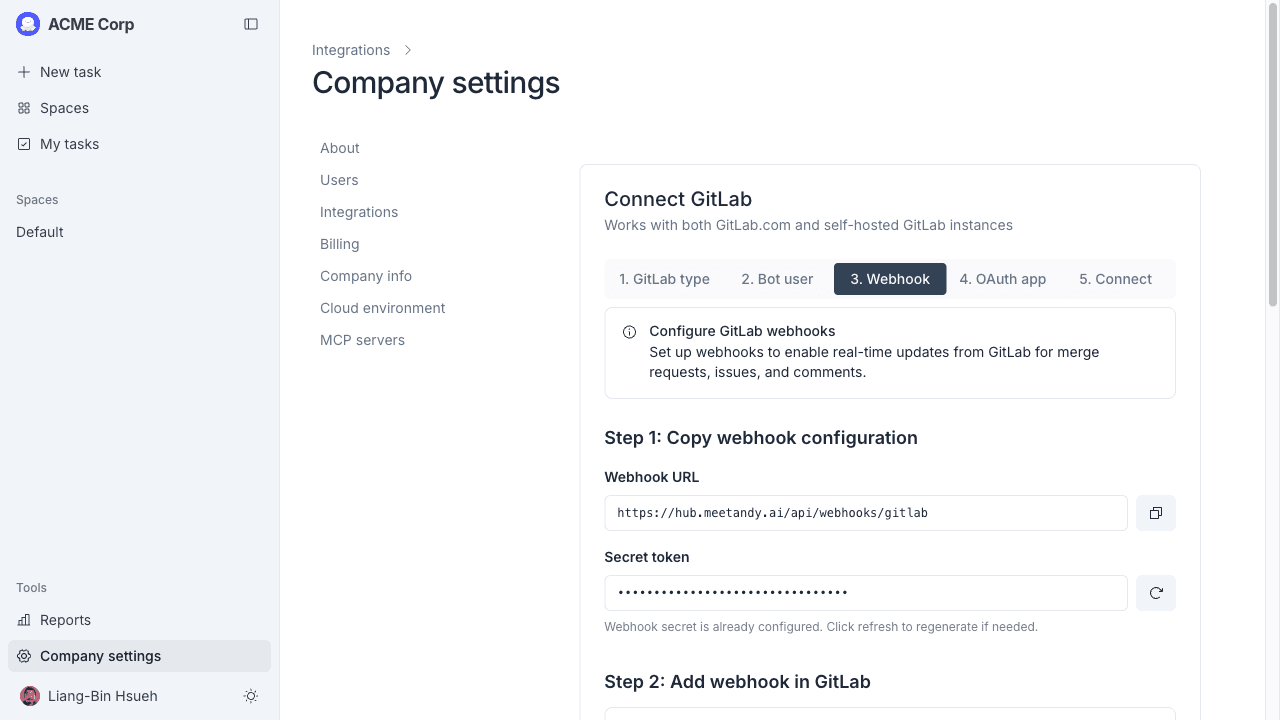
The webhook is how Andy receives merge request, pipeline, and comment events from GitLab in real time.
The wizard shows two values:
- Webhook URL: copy this
- Secret token: copy this (it's only shown the first time; regenerate from MeetAndy if you lose it)
In GitLab:
- Go to your group's Settings → Webhooks (or a project's webhooks settings).
- Click Add new webhook.
- Paste the URL and secret token.
- Tick the trigger events: Push events, Issues events, Merge request events, Pipeline events, Comments.
- Make sure Enable SSL verification is checked.
- Click Add webhook.
Click Next in MeetAndy.
Step 4: Create the OAuth application
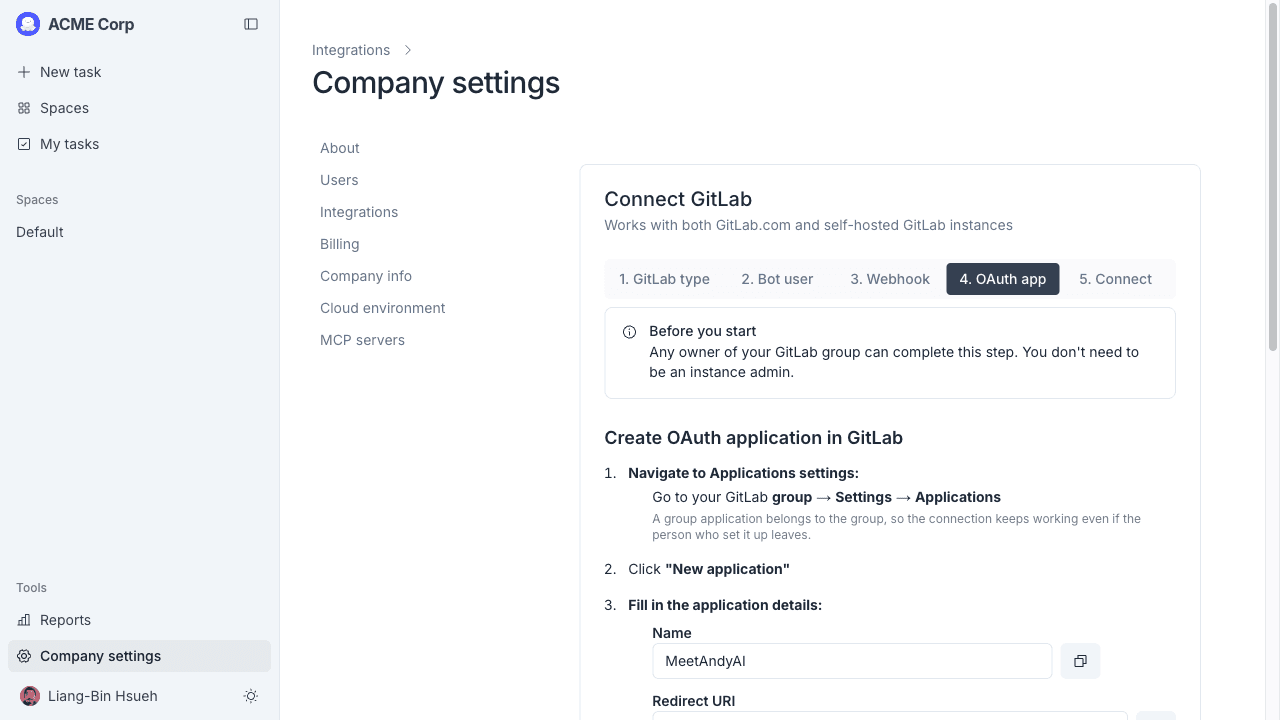
This is how MeetAndy authenticates as the bot user. The location differs slightly:
- GitLab.com: avatar menu → Edit profile → Applications
- Self-hosted: Admin Area → Applications
Create a new application with:
- Name:
MeetAndyAI(copy from MeetAndy) - Redirect URI: copy from MeetAndy
- Scopes: tick all five (
api,read_api,read_user,read_repository,write_repository)
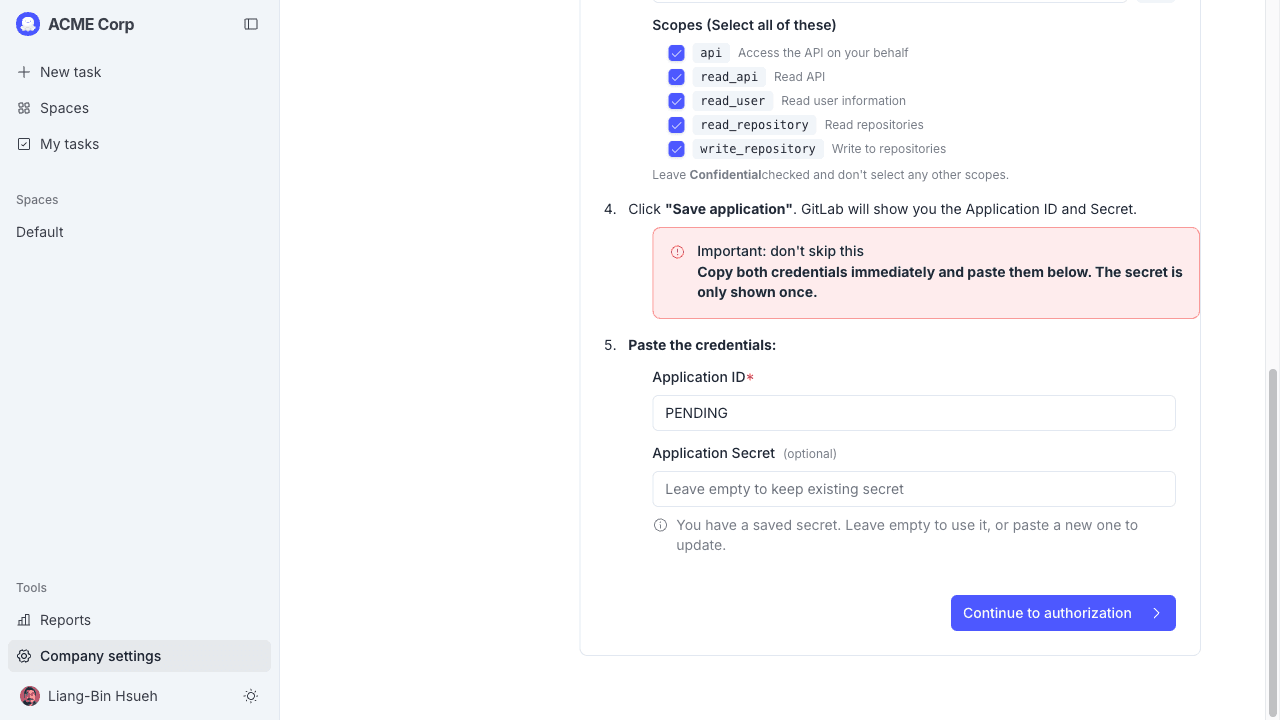
GitLab shows the Application ID and Application Secret once. Copy both immediately; the secret cannot be retrieved later. Paste them into the MeetAndy wizard and click Next.
Copy the application secret straight away. GitLab does not show it a second time. If you lose it, you'll need to delete the application and start over.
Step 5: Connect
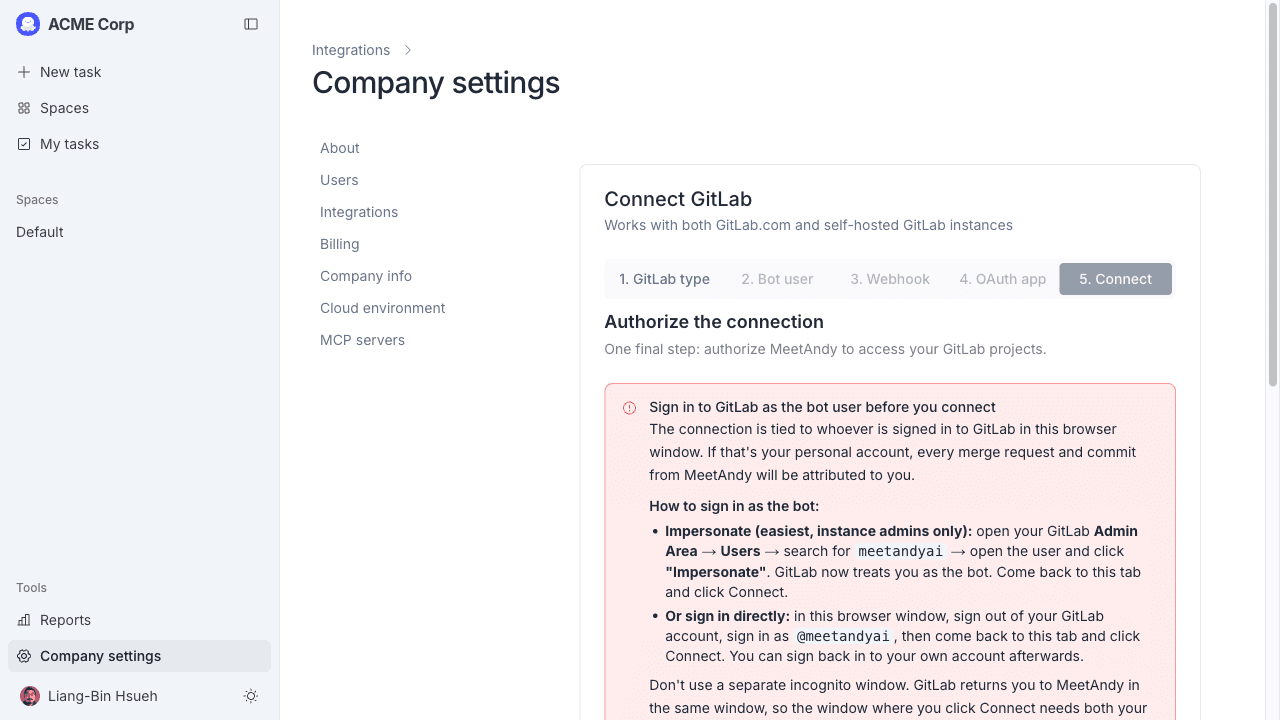
The final step authorizes MeetAndy on behalf of the bot user.
Before clicking the connect button, you must be signed into GitLab as the bot user
(@meetandyai). On self-hosted GitLab, use the Impersonate button on the bot's user page
instead of signing in directly.
- Switch your GitLab session to the bot user.
- Tick the confirmation checkbox.
- Click Connect to GitLab. You'll be redirected to GitLab to authorize, then back to MeetAndy.
- The success page shows the connected bot account. The GitLab card on Manage → Integrations now shows Connected.
Self-hosted: proxy / IP allowlist setup
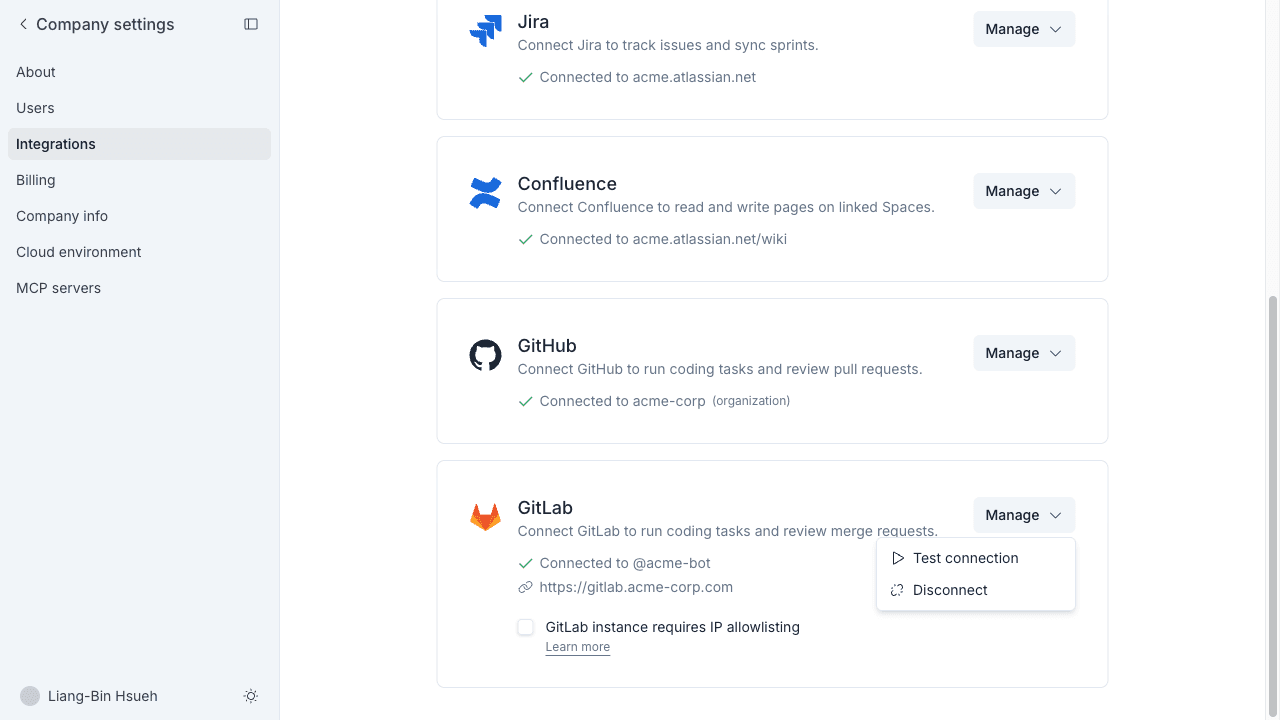
If your self-hosted GitLab is behind a firewall, MeetAndy needs to reach your instance from a known outbound IP. After connecting, you'll see an extra option on the GitLab card:
☐ GitLab instance requires IP allowlisting
Tick this box if your firewall blocks unknown IPs. Click Learn more for the full instructions. The short version:
-
Add this IP to your GitLab firewall / security group:
34.223.170.213 -
Allow connections from that IP on port 443 (HTTPS).
-
Save and apply your firewall rules.
-
Back in MeetAndy, ask Andy to fetch something (e.g.,
@MeetAndy what's in the repo?) to test the connection.
When the box is ticked, all GitLab API calls from MeetAndy route through a dedicated proxy at this IP, so your firewall only needs to allow this one address.

GitLab.com instances don't need this. gitlab.com is publicly reachable, so the IP allowlist toggle only appears for self-hosted setups.
Verify the connection
Back on Company settings → Integrations, the GitLab card shows Connected to: @meetandyai (or your bot's username). Open the card's Manage menu and click Test connection to confirm Andy can reach GitLab.
If the test connection fails on a self-hosted instance, the most common cause is the IP allowlist. Double-check that 34.223.170.213 is allowed inbound.
What Andy uses GitLab for
Once connected, Andy can:
- Read code in your projects to answer questions and plan work
- Open and update merge requests when you hand off a task to the Coding Agent
- React to merge request and pipeline events from your projects
You'll choose which projects Andy follows on a per-Space basis when you configure each Space.
Disconnecting
To remove the GitLab integration:
- Open Company settings → Integrations → GitLab in MeetAndy.
- Open the GitLab card's Manage menu and click Disconnect. MeetAndy drops the connection.
The OAuth application and the bot user's group/project access remain in place on GitLab. If you want to fully remove MeetAndy's footprint, also:
- Delete the OAuth application (avatar menu → Edit profile → Applications, or Admin Area → Applications on self-hosted)
- Remove the bot user from the groups and projects you added it to, or delete the bot account if you only used it for MeetAndy