Creating a task
How to give Andy a task from the web app.
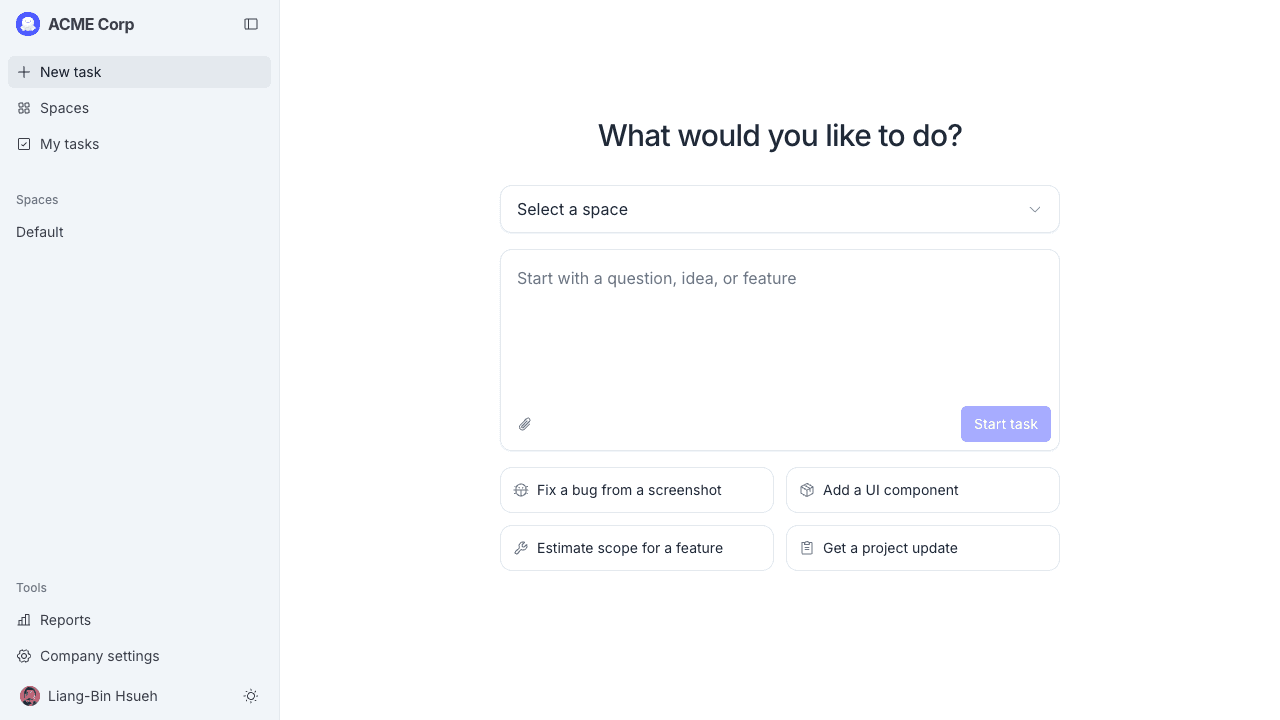
You can create a task from the web app instead of Slack when you have attachments to include or you want to write a longer description without cluttering a channel. The full-page form replaces the old dialog. Clicking New task in the sidebar now takes you to a dedicated /tasks/new page.
Open the new-task page
Click New task in the sidebar. The full-page form at /tasks/new opens with the same prompt chips and input as a Space's empty state.
Fill in the form
The page has a Space dropdown, a description field, and an optional attachments area:
- Space dropdown (above the input): pre-selects your current Space if you opened the page from inside one, or your last-used Space otherwise. Spaces that haven't been configured with a Git repository are disabled with the label link a code repo first.
- What would you like to do?: describe the task in plain language, the way you'd describe it to a teammate. Be specific: instead of "fix the bug," write "fix the date picker on the orders page that returns the wrong year for dates in December." Prompt chips below the input give quick examples to start from.
- Attachments (optional). Click the paperclip to attach files. You can add images (including pasted screenshots), PDFs, text/JSON, zip, and Office files (
.docx,.xlsx,.pptx). Each file shows up as a chip; click ✕ to remove one.
You can paste a screenshot directly into the description field; it attaches automatically.
Submit
Click Start task, or press Cmd+Enter (Ctrl+Enter on Windows/Linux) from inside the description field.
Once you submit:
- The task is created with status New and you're taken to the task details page.
- Andy starts planning right away, within a few seconds. The Activity tab updates as Andy works.
There's no separate "queue". The task moves into planning immediately.
What happens next
After Andy finishes planning, the task moves to Needs plan approval and you'll see a Review button on both the task details page and your Tasks list. Approve the plan to let Andy start coding. See Task details for the full lifecycle.